Issue page
Smartwatch adds a new section to your issue page. You will find it in the right column. It contains a list of the watches defined for the issue:
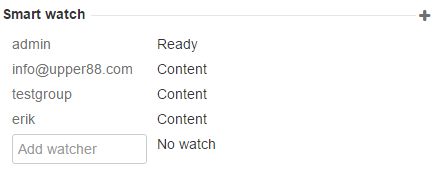

For each watch you see the userid of the watcher and the rule used for the watch. The rule determines which events that will trigger a notification. So in this case erik will be notified if the content changes, admin will be notified if the status changes and axel will be notified when the issue is ready. These are all predefined rules that come with the plugin but your JIRA administrator can set up your own rules or modify or deactivate the preconfigured ones.
Add or modify your watch
The top row in the list will always contain your own userid. If you do not have a watch for this issue it will say 'No watch', otherwise you will see the name of the watch. In any case you can use JIRA inline edit to add or update the watch. Just click on the rule and you will get a dropdown list containg all currently active rules plus 'No watch'. Select the watch you want, click the OK button, and you are done.

Remove your watch
You might have guessed this: to remove your watch click on the rule and select 'No watch' in the dropdown. Click the OK button and you're done.Add a watcher for another user
You can also add a watch for another user. Enter the userid in the input field where it says 'Add watcher', click on 'No watch' to the right of the field, select the watch and click OK. From version 1.2 you can also enter a group id or an email address, if your JIRA administrator has enabled this.
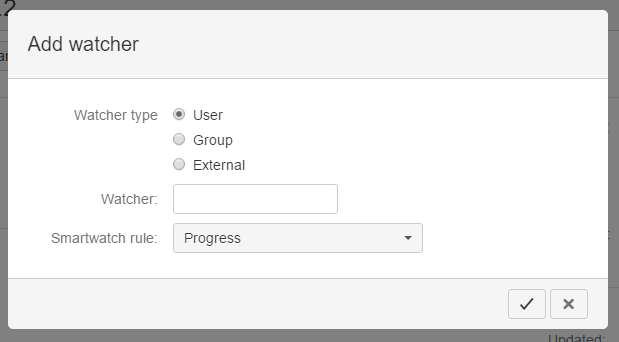
Use the popup to add watcher
Another option is to use the popup to add a watcher. You open the popup by clicking the plus sign. That opens the following dialog:
Profile page
Smartwatch also adds a new section to your profile page. This section defines watches that should be set up when you create or modify an issue or when it is assigned to you.
From version 1.1 it also includes a list of watches you want automatically created for you, based on project and issue type.
From version 1.1 it also includes a list of watches you want automatically created for you, based on project and issue type.
The new section looks like this:


- Set on create: this watch will be added to an issue you create
- Set on update: this watch will be added to an issue you modify if you do not already have a watch on it
- Set on assigne: this watch will be added to an issue when it is assigned to you, also if you do not already have a watch on it
For all thes there are system defaults set up by you JIRA administrator, but if you want other watches this is the place to define them. Simply click on the watch you want to change, select in the dropdown list that appers, click the OK button and you're done.
The autowatch table lists the projects and issue types where you want watches created automatically for you. If you leave issue type field empty watches will be created automatically for all issue types. You also have to select what type of watch you want and if you want to be notified immediately when the issue is created.
Automatically created watches looks and behaves like all other watches in the issue page, you can change the type of watch or remove them completely like any other watch.
Other profile settings
Smartwatch also uses some standard JIRA profile settings from the Preferences section:

The 'Email Type' setting will determine whether you get notifications in HTML or text format. Smartwatch uses the standard JIRA templates, so the content of the notifications will be the same. Also the 'My Changes' setting will affect smartwatch, if it is set to 'Do not notify me' you will not get any notifications for your own changes.
No comments:
Post a Comment